Most studio lighting rigs fail before a single fixture ever goes up. The culprit? Skipped steps that seem minor until they cost you thousands. Getting professional-grade results isn’t about expensive gear — it’s about load calculations, precise mounting hardware, and circuit planning done in the right order. Every stage matters, from the first measurement to your daily maintenance routine. This guide walks you through the entire process so your rig performs flawlessly every single time.
The Studio Lighting Rig Installation Process From Start to Finish
Before you start mounting fixtures and running cables, you’ll need to gather the right materials and tools.
Gathering the right materials and tools before you begin will set the foundation for a smooth, successful installation.
A successful studio lighting installation begins with ¾-inch gas line pipes, elbow fittings, flange mounts, and a stud finder. You’ll also need a drill, tape measure, cheeseborough clamps, and zip ties.
Once you’ve gathered everything, assemble your rig structure by anchoring vertical pipes into wall studs using floor flanges.
Connect horizontal pipes with elbow fittings to form a grid.
Use a 19mm ratcheting wrench to tighten all clamps securely.
Next, organise your lighting into three to five zones. In professional television studio environments, a central lighting control desk is used to manage all zones from a single point, giving operators precise command over every fixture in the rig.
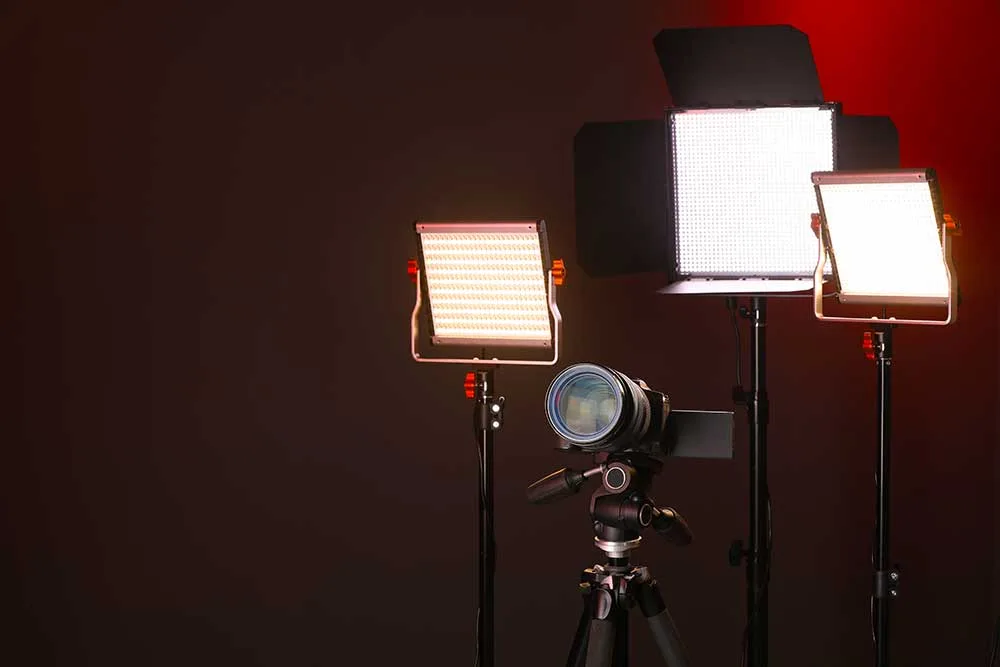
A three-point setup delivers a great result: key light provides primary illumination, fill light softens shadows, and backlight adds depth to your studio space. Every fixture suspended above head height must include a secondary attachment such as a safety cable or chain to prevent it from falling. This is a critical rigging safety requirement that protects both performers and audience members below.
Plan Your Studio Lighting Rig Zones Before Installing Anything
With your rig structure assembled, planning your lighting zones is the next critical step. Zone designation and coverage planning organises your fixtures to meet classic three-point lighting requirements across your entire space.
Start by dividing your studio into distinct zones: shooting, editing, and client areas. Your ceiling and rigging infrastructure determines where fixtures mount and how coverage overlaps between zones. Overlap prevents uneven brightness across your frame, which is a great result for consistent production quality.
Your electrical infrastructure planning ties everything together. Mark your panel locations on your floor plan and assign dedicated circuits to each zone. This prevents overload and simplifies dimming control. Larger or intricate setups may require 100-amp or 400-amp breaker boxes with multiple circuits to handle the total power load safely. For broadcast-grade studio environments, engineers specify isolated power distribution to protect sensitive lighting and camera equipment from voltage fluctuations caused by shared circuits.
Key zone planning steps:
- Map fixture coverage patterns
- Identify transitional zones needing fill lights
- Assign circuits per zone before installation begins
Match Your Fixtures to Studio Size and Shoot Type
Once you’ve mapped your zones, you need to match your fixtures to your studio’s size and your planned shoot type. Small studios work best with controlled modifiers like grids, beauty dishes, and optical spots, while larger spaces support continuous lighting devices on adjustable stands for moving subjects.
Your fixture choices also depend on CRI (Color Rendering Index), which measures how accurately a light source reveals colours, and wattage output, both of which directly affect your final image or video quality. LED fixtures are a strong option to consider, as they offer energy efficiency, durability, and colour temperature control while remaining compact enough to fit a variety of studio sizes and shoot types. For video podcast productions in particular, lighting decisions should align with your camera and cabling setup, since SDI-connected PTZ cameras and hardware video switchers each respond differently to light intensity and colour temperature.
Small Studio Fixture Picks
Choosing the right fixtures for a small studio depends on the size of your space and what you’re shooting. Wall sconces work well in studios under 400 sq ft, preserving precious floor space. They mount directly to walls and integrate easily into multifunctional zones.
For studios between 300–500 sq ft, pendant lights are a great result. They provide task lighting over foldable surfaces without cluttering your layout. Recessed lighting suits low-ceiling spaces by distributing even light across open floor plans. Hard reflective surfaces like glass and plaster are known to scatter and reflect energy unpredictably, a principle that applies equally to both light and sound in professionally designed studio spaces.
Much like professional audio gear and broadcast equipment, your lighting setup must fit your workflow precisely. Just as an audio mixing console organises sound sources efficiently, mounted track lighting directs light precisely to sleep or work areas. Adjustable heads suit studios between 250–450 sq ft. Nightstands or accent pieces with chrome legs reflect light to visually expand the perceived size of your small studio area.
Shoot Type Lighting Needs
Fixture selection sets the foundation, but matching your lighting rig to your shoot type takes your studio from functional to professional.
Portrait shoots use three-point lighting: key light, fill light, and back light. Product photography works well with two lights and rim lighting techniques.
Fashion shoots benefit from soft side lighting plus rim lighting for dimension. Like organised server rack configurations or structured telecommunications hardware setups, your lighting rig needs logical arrangement for reliable results.
- Portrait: three-point setup with diffused strobe
- Product: two lights with large softboxes
- Fashion: two versatile modifiers for output control
- Continuous lights suit beginners; strobes offer advanced control
Matching fixtures to shoot type delivers a great result every time. Studio environments that rely on DMX control desks can automate intensity and colour temperature adjustments across multiple fixtures simultaneously, reducing manual intervention between setups. For shoots involving products, food, or fashion, prioritise fixtures with high CRI values above 90 to ensure accurate, vibrant colour rendering in every frame.
CRI and Wattage Matter
When selecting fixtures, CRI and wattage directly determine how accurate and evenly lit your studio will be. CRI measures how faithfully a light source reproduces colour, scored on a scale from 1 to 100.
For live-streaming or colour-critical work, target 97+ CRI. General commercial lighting requires a minimum 80 CRI baseline. The difference matters:
- 80 CRI LED produces noticeable colour distortion
- 97 CRI renders colours nearly identical to natural daylight
- 90+ CRI reveals lively, natural hues
Match your wattage to your studio size using lumens, not watts. An 85-watt compact fluorescent bulb at 5000K–5500K with 90+ CRI yields 5,000 lumens, a great result for small studios with 8–10 foot ceilings. Larger spaces require higher lumen output for even coverage. In large commercial venues such as hotel ballrooms, heavy ceiling rigging points must be engineered and installed before structural work closes to safely support stage lighting loads.
Distribute Power Correctly Before Your First Fixture Goes Up
Before you hang a single fixture, you need to calculate your total wattage load. Small productions typically draw between 1,000 and 3,000 watts, while a 1,200-square-foot studio setup can require up to 60,000 watts across roughly 25 dedicated 20-amp circuits.
Each lighting group — front wash, back lights, moving heads, wall wash — needs its own dedicated circuit with breaker protection, so one overloaded feed trips its breaker without shutting down your entire rig. In broadcast-grade installations, server racks and high-draw equipment are routinely supported by independent UPS systems to maintain power continuity during unexpected outages or switchovers.
Calculate Total Wattage First
Calculate your total wattage before a single fixture goes up. Add every fixture’s wattage together first. This gives you your baseline load number.
| Fixture | Wattage | Amps at 240V |
|---|---|---|
| Theatre Lantern | 500W | 2.08A |
| Theatre Lantern | 650W | 2.70A |
| Theatre Lantern | 1000W | 4.16A |
Use Ohm’s Law: Amps = Watts ÷ Volts. A 1000W lamp draws 4.16A at 240V. Twelve 650W lamps draw 32.4A total across your rack.
Add 10% headroom to every circuit. A 30A circuit loads to no more than 27A safely. This protects your rig and your team.
Broadcast studios demand zero-failure environments, meaning your power distribution must be engineered with zero margin for error from the moment the rig is designed.
Apps like Electrodroid simplify these calculations quickly. You’ll get great results when your numbers are solid before installation begins.
Dedicated Circuit Protection Matters
Dedicated circuits protect your studio lighting rig from the moment power flows through your panel. High-wattage lights, like 5,000W or 10,000W units, draw serious current. Sharing circuits with audio gear causes breaker trips and overheating wires.
Your circuit layout should include:
- 15A circuits for standard overhead lighting
- 20A dedicated circuits for high-load equipment
- 100A breakout distro for large commercial setups
Separate circuits also reduce RFI and EMI interference, protecting your recordings. Star grounding gives your audio gear an isolated path away from lighting systems. That’s a great result for sound quality.
Plan your distribution from the panel outward before installing any fixture. Use red-coded outlets for studio electronics and separate outlets for overhead lights. Your electrician calculates load using UL-label wattage and amp ratings.
How to Mount Fixtures, Route Cables, and Lock Down Your Rig
Getting your fixtures mounted correctly sets the foundation for a professional, safe studio lighting rig.
Use Impact Varipoles to create floor-to-ceiling tension for renter-friendly setups. Attach lights to these poles using Mafer clamps for secure, repositionable positioning.
For ceiling and grid installations, locate studs before bridging with 2×4 or plywood boards. Use C-clamps with 5/8-inch studs to mount fixtures onto trusses or grids. Always attach safety chains rated to your fixture’s weight through the yoke.
Route cables efficiently by positioning lights near power sources. Secure cables along poles and walls to eliminate tripping hazards. Toggle bolts replace plastic anchors for heavy-duty drywall connections, providing a great result under load.
Following these steps puts you firmly in the professional studio-builder community.
How to Test, Troubleshoot, and Maintain Your Studio Lighting Rig
Once your rig is mounted and cabled, testing and maintenance keep it performing reliably over the long term. Power on every fixture and confirm normal boot sequences, DMX/sACN control response, and consistent LED output. Check for flickering, colour shifts, or clicking sounds immediately.
| Maintenance Schedule | Key Tasks |
|---|---|
| Daily | Visual inspection, power-on test, safety cable check |
| Weekly | DMX512 connections, lens cleaning, cable tightening |
| Monthly | PCB inspection, lamp hour verification, bearing lubrication |
You’re part of a community that values precision and reliability. Swap suspect DMX cables, test with a known-good controller, and verify 120-ohm termination resistance when control errors appear. Log every inspection to track trends and catch failures early. That’s a great result for any professional rig.