Most live broadcasts don’t fail because of bad cameras or weak lighting — they fall apart at the switcher. One misconfigured input, one missed sync check, and your polished production becomes an embarrassing mess of glitching signals and dropped feeds. Installing a video switcher for live TV demands precision across every SDI, HDMI, and XLR connection you make. Get it right, and you control the broadcast like a seasoned director. The setup decisions that separate flawless output from on-air chaos are exactly what this guide covers.
Choose the Right Video Switcher for Live TV Broadcast
Choosing the right video switcher starts with grasping your production’s scale and technical requirements. Your input count matters first. Small setups work well with basic switchers offering 2–4 HDMI inputs. Larger productions need more.
Matching your video switcher to your production’s scale starts with one critical factor: how many inputs you actually need.
Consider these options based on scale:
- Small teams: ATEM Mini Pro provides 4 HDMI inputs with USB H.264 recording
- Mid-scale events: Lumantek ez-PRO VS10 delivers 10 inputs (8 SDI, 2 HDMI) with PTZ control
- Large broadcasts: ATEM Constellation HD supports 20–40 SDI inputs with standards conversion
Resolution support is equally important. The YoloBox Extreme handles 4K multicam recording, while the Roland V-1HD processes professional 1080p with built-in effects. Matching your video switcher to your production size produces a great result every time. For large master control room environments, professional video routing chassis can handle hundreds of SDI feeds simultaneously, making them essential infrastructure alongside your switcher. Some switchers can stream directly to major platforms via ethernet without requiring a workstation, which is an important connectivity consideration for your setup.
How to Wire HDMI, SDI, and XLR Inputs to Your Switcher
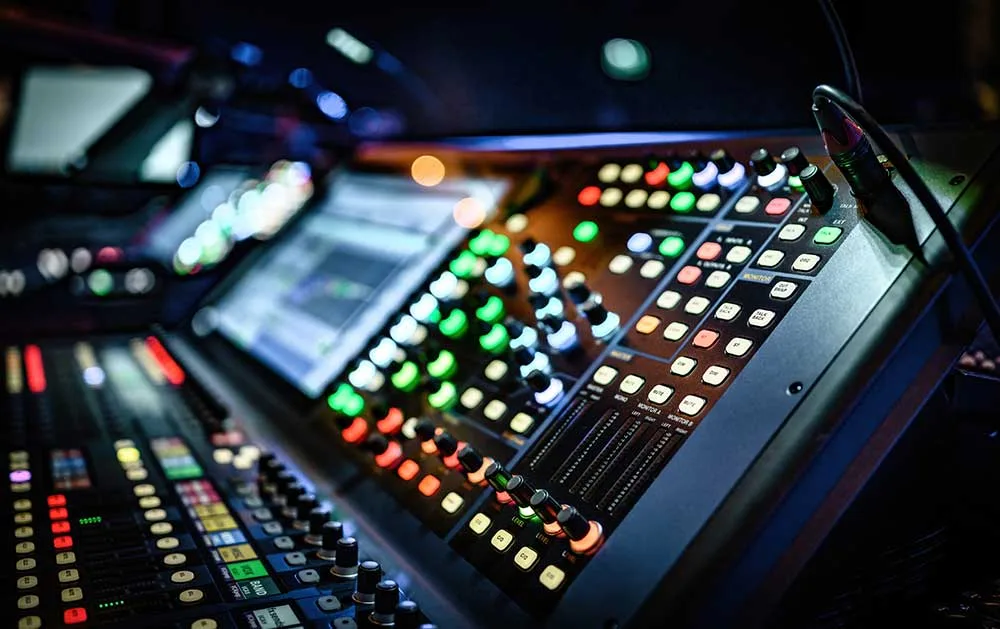
Wiring your inputs correctly sets the foundation for a clean, professional broadcast. Your video switcher accepts HDMI, SDI, and XLR connections, each serving a specific role. Grasping these connections puts you in control of your setup.
| Connection | Cable Type | Max Run Length |
|---|---|---|
| HDMI | Type-A | ~50 feet |
| SDI (3G) | 75 Ohm coax | 300+ feet |
| SDI (12G) | Double-shielded coax | 300+ feet |
| XLR Audio | Balanced mono | Varies |
| XLR to TRS | Conversion cable | Short runs |
Connect cameras to labelled SDI input ports using BNC connectors. Use locking HDMI cables for secure consumer-source connections. Enable 48V phantom power for condenser microphones on XLR inputs. Power on your switcher only after all sources are connected. Large-scale broadcast environments often route over 4 km of shielded HD SDI and fibre optic cables, with each cable individually labelled and tested to ensure signal integrity across complex multi-source installations. Professional switchers also support NDI for wireless camera feeds, eliminating the need for physical cable runs across your production environment.
Set Up OBS or vMix for Live Broadcast Switcher Integration
With your physical inputs wired and your sources feeding into the switcher, your next step is connecting software to your hardware signal chain. OBS Studio and vMix both integrate with your video switcher through NDI protocol, transmitting video and audio without quality loss.
OBS Studio and vMix integrate with your video switcher through NDI protocol, transmitting video and audio without quality loss.
Here’s how to connect them:
- Add NDI sources in OBS by selecting the add input button and navigating to NDI sources
- In vMix, add inputs and select the OBS virtual camera source
- Make certain both systems share the same network connection for NDI to function
You can run OBS and vMix on separate computers to reduce processing load. This two-system setup delivers a great result for complex multi-camera productions. For large-scale productions, hardware video encoders compress your mixed feeds reliably before delivering the final stream to remote audiences.
Your community of broadcast professionals relies on this workflow daily. When using vMix Desktop Capture as an alternative to NDI, both systems must be connected to the same LAN cable to ensure proper network visibility between machines.
Switch Live Inputs and Apply Broadcast-Quality Effects
Once your software is connected, switching live inputs becomes the heart of your broadcast operation. You select active video sources using dedicated buttons or touchscreen controls. Compact switchers like the Roland V-1HD support 4 HDMI inputs for real-time selection.
| Effect Type | Function | Benefit |
|---|---|---|
| Fades | Smooth source changes | Professional broadcast flow |
| Chroma Key | Background replacement | Clean compositing |
| Image-in-Image | Overlay secondary video | Richer viewer experience |
Multiview previews display all inputs simultaneously before you commit to a final selection. This keeps your team confident and coordinated during live production. Tally lights notify camera operators which source is currently live. PTZ cameras mounted to walls or ceilings can be controlled by hardware controllers to switch between angles instantly, keeping coverage precise and responsive throughout the broadcast.
Broadcast-quality effects like DVE zooms, wipes, and dissolves apply in real-time without stream interruptions. You’ll achieve a great result when effects and video changes work seamlessly together. Low-latency processing ensures that real-time switching has minimal impact on live monitoring and the overall audience experience.
Test Your Video Switcher and Stream Output Before Going Live
Before going live, you always need to test your video switcher and stream output thoroughly. Connect your cameras to the HDMI/SDI inputs and confirm USB 3.0 output registers as a webcam on your computer. Check multi-view previews for all sources and verify 1080p at 60fps support on your switcher model.
Run a speed test using the stream quality button. Use 720p for general streams, but 1080p requires a sturdy network connection. Switch to a wired connection if lagging occurs. For broadcast environments requiring 24-hour continuous operation, ensure your switcher and network infrastructure are stress-tested well beyond the expected broadcast duration.
Conduct a private test broadcast to simulate live conditions:
- Record switched output to verify capture quality
- Check image-in-image mode functionality
- Test multiple camera angles simultaneously
Monitor audio-video sync during playback. The VIDEOCAST supports direct streaming support to YouTube, Facebook, Twitch, and RTMP services, so confirm your stream key is correctly pasted into your chosen platform settings before going live. A successful private test is a great result before your broadcast goes live.