Most studio builds in 2026 go over budget before a single camera rolls — not because of overspending, but because of poor equipment planning. 4K HDR cameras, ST 2110 IP routing, and cloud-native automation have completely rewritten what “professional broadcast standards” actually means. Every decision you make, from acoustic treatment to signal flow, will either cost you or save you millions. Getting this right starts with knowing exactly what to prioritise.
How to Plan Your Television Studio Layout for 2026
Planning your television studio layout starts with one foundational question: what kind of content will you produce? News broadcasts, talk shows, and scripted productions each require different configurations. Your content type directly shapes every spatial decision you’ll make.
Your content type is the blueprint for every studio decision — start there before anything else.
Define your studio’s purpose before measuring a single wall. Consider these key factors:
- Participants on set: More talent means more allocated space
- Audience presence: Live audiences require dedicated seating zones
- Format flexibility: Multipurpose studios can span configurations totalling 100,000 square feet
You’ll also want to align your studio’s aesthetic with your target audience. A high-tech look appeals to different viewers than a casual, youthful setting. Match your visual identity to your content strategy from the start. Working with an experienced team like Ball Media Innovations helps ensure your vision and objectives are aligned from the very beginning.
For studios planning a transition or expansion, a parallel-build strategy allows you to maintain live services and continue broadcasting without interruption while new infrastructure is being installed alongside existing systems.
Core Broadcast Equipment Every Modern Studio Needs
Once your studio layout is confirmed, it’s time to equip it with the right broadcast hardware. Every modern studio needs core systems working together seamlessly. You’re joining a global industry valued at USD 6 billion in 2026.
| Equipment Category | Key Component | Function |
|---|---|---|
| Audio Capture | Broadcast mixer | Presenter control surface |
| Visual Systems | 4K HDR camera | High-resolution acquisition |
| Signal Routing | IP infrastructure | ST 2110 data transport |
| Storage & Processing | Server rack | Codec and replay management |
| Monitoring | Reference displays | Source signal integrity |
Your server rack centralises processing, storage, and routing hardware efficiently. IP-based systems using ST 2110 standards are now the default for 2026 upgrades. Cloud-native automation scales alongside your operational growth, supplying a great result for expanding facilities. Myriad Cloud was awarded NAB Show Product of the Year 2024, validating the industry shift toward cloud-native broadcast platforms over traditional on-premise server infrastructure.
Professional video routing chassis handle hundreds of SDI feeds simultaneously, making them a critical component within master control rooms where signal integrity across multiple sources must be maintained without interruption.
How to Install and Rig Studio Lighting Correctly
Rigging studio lighting safely starts with securing every light on a rated stand or overhead grid before you power anything on.
You’ll want to position your key light at a 45-degree angle to your subject, place your fill light on the opposite side, and direct a third light onto your backdrop to eliminate unwanted shadows.
Keep all lights 2–3 feet from your subject as a baseline, then test and adjust distance, intensity, and angle until the light interactions match your intended result. Use a light meter to balance the intensity among your key, fill, and background lights so no single source overpowers the others.
For multi-camera productions, PTZ broadcast cameras mounted to walls or ceilings can be networked to a controller desk, allowing a single operator to manage all video angles without disrupting the lighting setup.
Rigging Lighting Safely
Getting studio lighting right means grasping both the creative and the safety demands of overhead rigging. You’re part of a professional community that holds safety as a non-negotiable standard. Every overhead fixture requires safety cables, securing lights back to the grid and preventing accidents.
Follow these rigging essentials:
- Attach safety cables to every suspended fixture without exception
- Use certified clamps for every fixture attachment point
- Spread fixtures across multiple grid points for balanced load distribution
- perform pre-audience rigging checks before every production
You’ll also want to inspect all rigging components regularly for wear, tear, and damage. End-to-end testing before use is mandatory. For professional studio environments, power distribution boxes should supply clean, isolated electricity to lighting rigs to protect sensitive fixtures from damaging power surges.
Continuous communication between your crew and rigger keeps everyone aligned and operations running safely throughout every production session. Always confirm your clamp and pipe compatibility before beginning any overhead installation, as mismatched components can compromise the security of every fixture on the grid.
Optimising Light Placement
Correct light placement always determines whether your studio footage looks professional or amateurish. Your community of broadcasters follows proven ratios for great results.
Key Light: Position it 45 degrees from the subject and 45 degrees above the camera plane. Set intensity to 150 foot-candles.
Fill Light: Place it opposite the key light at a lower angle. Maintain 50 foot-candles to balance contrast without flattening shadows.
Back Light: Install it 60–75 degrees above horizontal, behind the subject. Set intensity to 100 foot-candles for clean depth separation.
Base Lighting: Establish 50 foot-candles across your set using floodlights or scoop fixtures. Position ceiling lights around the room perimeter so they illuminate the floor area without creating unwanted screen glare.
Pairing these ratios with professional audio gear and quality fixtures like the Aputure Amaran 200x guarantees your studio delivers consistently sharp, broadcast-ready footage. Alongside lighting, treating your studio walls with acoustic foam panels reduces flutter echo and reverberation time, ensuring your audio matches the visual quality your lighting setup delivers.
How to Set Up Studio Audio for Crystal-Clear Broadcast Sound
Once your studio lighting is rigged correctly, you need to turn your attention to audio, because poor sound quality will undermine even the sharpest video feed. You’ll choose studio microphones based on your broadcast format, whether that’s moving-coil mics for high-SPL environments or condenser mics like the sE Electronics MA-67 for detailed vocal capture.
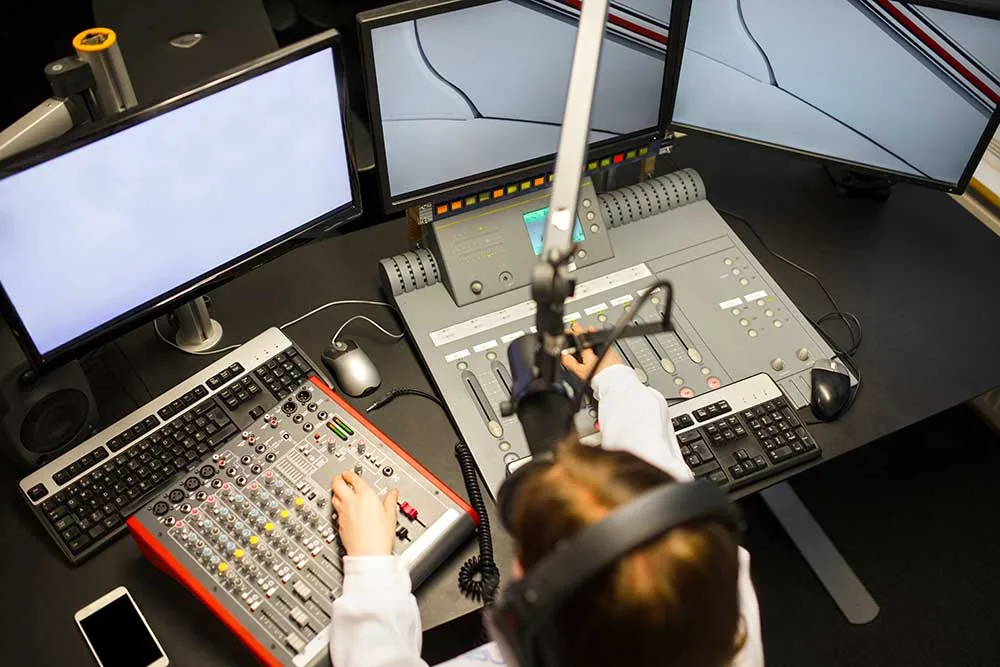
From there, you’ll route each microphone signal through an audio mixer, managing gain levels, equalisation, and output paths to achieve a clean, broadcast-ready signal. For live broadcast environments that demand continuous 24-hour operation, professional dynamic microphones paired with heavy-duty arms and stands are essential to maintain flawless audio quality and reject background noise throughout extended on-air sessions.
Choosing Studio Microphones
Choosing the right microphone shapes the entire sonic character of your broadcast. You’ll find two primary microphone types suited for television studios: condenser and dynamic. Each serves a distinct purpose in professional broadcast environments.
Condenser microphones like the Neumann TLM 103 deliver wide presence enhancements above 5kHz, making them ideal for studio vocals. The Neumann TLM 102 offers a 132dB dynamic range, which handles demanding broadcast sessions with great results.
Dynamic microphones like the Shure SM7B suit live broadcast workflows effectively. Its built-in shockmount and dual pop filters reduce unwanted noise. You’ll need a high-gain pre-amp, like the Cloudlifter CL-1, to drive it properly.
Commercial hospitality environments rely on wireless microphone systems and broadcast-grade mixing consoles to deliver the same sonic discipline found in television studios across large event venues.
Your microphone choice directly influences how your audience connects with your broadcast.
Audio Mixer Signal Routing
Your microphone selection determines the quality of the raw signal entering your audio chain. From there, your audio mixing console takes control.
It manages every input simultaneously, routing signals to the correct output buses.
You’ll assign each input source to a dedicated fader. The default output bus, P1, activates automatically when you create new faders. Buses P1 through P4 let you deliver multiple, distinct audio mixes at once.
Routing options give you precise channel control:
- Switch left and right channels to reverse the stereo field
- Duplicate the left channel across both outputs for mono-to-stereo conversion
- Isolate the right channel and expand it to full stereo
Balanced XLR cables maintain signal integrity throughout. Your final combined output is then ready for broadcast transmission. When selecting your mixing console, understanding the analogue vs digital trade-offs helps determine which platform best suits your studio’s technical requirements and long-term reliability goals.
Achieving Clear Broadcast Sound
Achieving crystal-clear broadcast sound starts with selecting the right microphone. Choose a mic with a signal-to-noise ratio above 90 dB. This specification eliminates unwanted noise from your broadcast signal.
Your audio filters setup matters equally. In OBS, apply these settings for professional results:
- Noise suppression filter: first in chain
- Compressor ratio: 3:1
- Threshold: -7.3 dB
- Attack: 1 ms, Release: 61 ms
Position your microphone in an acoustically treated space. Untreated rooms introduce reverb that overloads your audio processor.
Sourcing quality broadcast equipment guarantees you’re working with industry-standard tools from the start. Multiband compression targets specific frequency bands, providing that full, polished broadcast tone your audience expects. Follow compression with EQ for final clarity.
How to Configure Your Control Room for Seamless Signal Flow
When setting up your control room, signal flow is the backbone of everything you hear and see on air. Your telecommunications hardware must handle DSP routing, source selection, and priority zone management efficiently. Getting this right means every signal reaches its destination cleanly.
Signal flow is the backbone of your control room — get it right, and every signal reaches its destination cleanly.
Your DSP chain should follow this sequence:
- Input source selection
- EQ and dynamics processing
- Feedback suppression
- Flexible input-to-output patching
- Output limiting and speaker management
Modern control rooms increasingly favour software-based management platforms. These systems reduce heavy hardware dependency while improving operational workflow.
You’ll find that AV-over-IP integration delivers a great result for complex environments.
Choose your system design based on your facility’s existing infrastructure. Hardware-centric systems offer predictable, stable performance. Software platforms offer flexibility.
Both approaches serve professional broadcast operations effectively when configured correctly.
How Audio Africa Supports Your Complete Studio Build
From equipment supply to full installation, Audio Africa handles every phase of your studio build. They supply professional equipment including microphones, monitors, and intercom systems. You’re part of a community that builds studios the right way.
| Service | Details |
|---|---|
| Equipment Supply | Microphones, monitors, audio interfaces |
| Expert Installation | Studios, venues, events nationwide |
| Rentals | Audio gear, sound systems, studio equipment |
| Upgrades | Mac/PC systems, home studios, production spaces |
Audio Africa covers Johannesburg, Cape Town, and Durban. Their installations include FM and TV broadcasting equipment, converters, and studio clocks. You get complete setup and calibration for clear, balanced sound. Whether you’re starting fresh or upgrading, their nationwide support guarantees your studio performs reliably from day one.